10 Simple Steps to Sight Your Rifle Scope
To sight your rifle scope accurately, it’s essential to follow a few simple steps.
Start by properly mounting the scope and understanding its features.
Select an appropriate zero distance based on your needs, then set up your target at that distance.
Fire an initial shot to create a bullet hole for reference, adjust the reticle accordingly, and take a series of shots to confirm your zero.
Finally, remember to clean your rifle and check the mounting before storing it.
There’s more to explore on perfecting your aim.
Key Takeaways
- Choose an appropriate zero distance based on your shooting purpose, like 100 yards for precision or point blank for hunting.
- Securely mount the scope, ensuring all components are tightly fastened to avoid misalignment during shooting.
- Fire an initial shot at the target, then observe the bullet hole’s position relative to the bullseye for adjustment.
- Use the elevation and windage turrets to adjust your reticle, accounting for the bullet hole’s distance in MOA or MRAD.
- Confirm your final zero by taking multiple shots and documenting the results, ensuring to reset turrets for future use.
It Starts With Mounting
Mounting your rifle scope correctly is vital for achieving that perfect shot.
Proper mounting guarantees a repeatable zero, while incorrect tightening of screws can lead to misalignment, hindering your accuracy.
Properly tightening your scope screws ensures alignment, while loose screws can compromise your accuracy and repeatable zero.
You need to make certain all components, including rings and bases, are securely fastened during the mounting process.
This prevents any unwanted movement while shooting.
Familiarizing yourself with your specific scope’s mounting requirements is critical, as it can greatly boost your marksmanship.
Don’t hesitate to use video resources for guidance; they can provide valuable insights into the alignment process and reduce frustration from improper setup.
Taking the time to thoroughly check your mounting alignment can save you time and ammunition, ultimately enhancing your shooting performance.
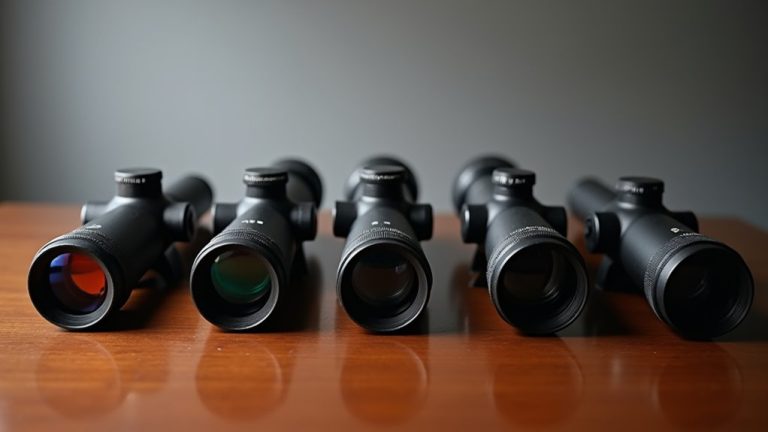
The Rifle Scope
Once your rifle scope is securely mounted, it’s time to explore its features and functionality.
Understanding these elements will help you make the necessary adjustments for precise aiming. Here are a few key features to take into account:
- Magnification Adjustment: Use the power ring to change magnification levels, ensuring clear target visibility.
- Elevation and Windage Turrets: These allow for fine-tuning your aim, compensating for bullet drop and wind drift.
- Objective Lens Size: A larger lens gathers more light, providing brighter images, especially in low-light conditions.
Familiarizing yourself with these components of your rifle scope is essential.
Each feature plays a role in enhancing your shooting experience and overall accuracy.
Understanding MOA and MRAD
To get the most out of your scope, you need to understand the basics of MOA and MRAD.
MOA, divided into 60 segments, helps with precise adjustments in inches, while MRAD offers a metric-friendly angle measurement for accurate shooting.
Knowing how to apply both can enhance your marksmanship and simplify your shot calculations.
MOA Basics Explained
Understanding the fundamentals of angular measurements like Minutes of Angle (MOA) and Milliradians (MRAD) is essential for any shooter looking to enhance their precision.
MOA is particularly useful for scope adjustments, as it subdivides a degree into 60 segments. At 100 yards, one MOA is roughly 1.047 inches.
Here are some key points about MOA:
- Common adjustments for scopes are 1/4, 1/3, and 1/2 MOA.
- MOA helps you calculate bullet drop and ranging more easily.
- Familiarity with MOA allows for effective translation of linear distances into angular measurements.
MRAD Measurement Overview
While MOA provides a solid foundation for making precise adjustments, MRAD offers an alternative measurement system that many shooters find advantageous.
MRAD, or milliradian, measures angles in radians, with one MRAD covering roughly 3.6 inches at 100 yards. This system is divided into 1000 segments, allowing for fine adjustments that can enhance accuracy.
Unlike MOA, which is commonly used in the U.S. and breaks down into 1/4, 1/3, and 1/2 MOA, MRAD aligns well with the metric system. This makes calculations involving drop and ranging easier for shooters.
Understanding the differences between MOA and MRAD can help you make quicker, more accurate adjustments based on your personal preferences or shooting conditions.
Practical Application of Adjustments
When you’re out in the field, knowing how to apply adjustments in MOA or MRAD can make all the difference in your shot accuracy.
Understanding how to effectively use these measurements helps you manage elevation and windage for precise aiming. Here are some key points to remember:
- MOA adjustments: One Minute of Angle equals about 1.047 inches at 100 yards, allowing for fine-tuning of your aim.
- MRAD advantages: With one MRAD being roughly 3.6 inches at 100 yards, it’s great for those who prefer metric.
- Scope familiarity: Know your scope’s specific adjustments, whether in MOA or MRAD, to enhance your marksmanship.
Mastering these concepts will elevate your shooting game!
Select Zero Distance
How do you choose the right zero distance for your rifle? The selection hinges on your intended use.
For instance, hunters often opt for a point blank zero, allowing for quick target acquisition up to about 300 yards.
Meanwhile, precision rifle shooters typically favor a 100-yard zero, offering a consistent reference for bullet drop calculations.
Here’s a quick comparison:
| Use Case | Recommended Zero Distance |
|---|---|
| Hunting | Point Blank Zero |
| Precision Shooting | 100 Yards |
| Long-Range | 200-300 Yards |
| Tactical | Varies by engagement |
Choosing the right zero distance greatly affects your rifle’s trajectory.
Set Initial Target
To set your initial target, choose a clear bullseye at a distance that suits your needs, like 25 yards.
Make sure you use a stable support to keep your shots consistent.
This way, you can effectively measure your adjustments and get on the right track with your sighting.
Choose Optimal Distance
What distance should you choose for sighting in your rifle scope?
It’s essential to pick a suitable distance that suits your shooting style. Starting at 25 yards is common, as it helps guarantee your shots are on paper. For most shooters, zeroing at 100 yards is recommended for better accuracy at longer ranges.
Here are a few tips:
- Consider your rifle’s intended use: hunters may favor a point-blank zero, while precision shooters typically opt for 100 yards.
- Starting closer allows for easier adjustments and confirms the scope’s alignment.
- Consistency in target selection helps maintain accurate calculations for scope adjustments.
Don’t hesitate to consult your local gunsmith for further advice tailored to your specific needs!
Use Stable Support
Using stable support is essential for accurate rifle scope sighting.
To achieve this, use one solid shooting rest, like a bench or sandbags, to minimize movement and keep your rifle stable.
Position your initial target at a distance of 25 yards, which makes adjustments easier.
Make sure the target is clearly visible and securely mounted to withstand wind or other environmental factors.
A grid target with precise measurements helps you make accurate adjustments based on where your shots land.
Before taking your first shot, double-check that your rifle is aimed directly at the target.
This setup allows for a more straightforward sighting adjustment process, ensuring you’re on target for your next shot.
Select Clear Target
Selecting a clear target is essential for effective rifle scope sighting. To guarantee accuracy, choose a target that’s easily visible and has a clear bullseye.
Setting your initial target at 25 yards is ideal for making adjustments before moving to longer distances. Here are some tips to help you select the right target:
- Opt for high contrast colors to enhance visibility.
- Use a grid target with known measurements for precise scope adjustments.
- Confirm the target is well-lit to avoid any visibility issues.
Once you’ve set up your target, focus on the center of the target. A stable and secure target will improve your chances of hitting your mark consistently.
Establish Your Position
A solid shooting position is essential for achieving accuracy when sighting your rifle scope.
Establish a stable setup using a bench, rifle stand, or sandbags to minimize movement.
Verify your body’s comfortable, allowing for consistent aim without straining.
Align your rifle so both the barrel and scope point directly at the bullseye.
| Aspect | Tips |
|---|---|
| Stability | Use benches, stands, or sandbags for support |
| Grip | Maintain a natural grip; elbows on surfaces |
| Eye Relief | Position your head for full view without strain |
Fire and Adjust
Now that you’re set up, it’s time to take your initial shot at the center of the bullseye.
After you fire, check the bullet hole to see where adjustments are needed for your scope’s reticle.
Use the turrets to align the reticle with the hole, ensuring your rifle stays stable during this process.
Take Initial Shot
Taking your initial shot is vital for sighting in your rifle scope accurately.
Aim your scope at the center of the bullseye and fire while maintaining a steady position. This shot will create a bullet hole on the target, providing a reference point for adjustments.
- Make sure your rifle is steady during the shot.
- Take note of where the bullet hole appears relative to the bullseye.
- Prepare to adjust the reticle with the turrets, moving it from the bullseye to the bullet hole.
Confirm the alignment of the reticle after making adjustments to verify accuracy.
This step is critical before taking any subsequent shots to guarantee your rifle is sighted in correctly and ready for use.
Observe Bullet Hole
After firing your initial shot, closely examine the bullet hole on the target to see where it landed in relation to the bullseye.
Maintain focus on the bullseye while looking through the scope so you can accurately assess the impact point.
It’s crucial to observe the bullet hole’s position, as this will guide your next steps.
You’ll want to adjust the reticle towards the bullet’s location to correct your aim.
Make precise adjustments based on how far the hole is from the bullseye, typically measured in MOA or MRAD.
After making those adjustments, confirm your changes by taking additional shots and ensuring that the reticle aligns with the bullet hole, refining your shot group for accuracy.
Adjust Scope Reticle
Once you’ve examined the bullet hole and noted its position relative to the bullseye, it’s time to adjust the scope reticle to align with your shot.
Keep your rifle steady and use the turrets to move the reticle from the bullseye to the bullet hole. Here are some key points to remember:
- Each click of the turret usually equals 1/4 MOA, which is about 1 inch at 100 yards.
- Maintain rifle stability while making adjustments to avoid new variables affecting accuracy.
- After adjusting, fire additional shots to confirm the alignment and guarantee a reliable zero.
Confirm Final Zero
Confirming your final zero is essential for ensuring your rifle’s accuracy at the desired distance, typically around 100 yards.
Start by taking a series of shots at your target. After making any necessary adjustments, fire about 20 shots to verify your zero.
Record the shot group’s locations to evaluate consistency. If shots aren’t grouping well around the center, reassess your shooting technique.
| Shot Number | Location on Target |
|---|---|
| 1 | (x, y) |
| 2 | (x, y) |
| 3 | (x, y) |
| 4 | (x, y) |
Document your final zero settings, including rifle, scope, ammunition, and conditions.
This helps with future confirmations and adjustments.
Post-Session Cleanup
Completing your shooting session marks just the beginning of maintaining your rifle’s performance.
The post-session cleanup is an important part of guaranteeing your equipment stays in prime condition for future use. Here are a few essential steps to follow:
- Reset the scope turrets back to zero for easy reference when you shoot next time.
- Document important details like your rifle type, scope model, ammunition used, and conditions. This organized record helps with future adjustments.
- Clean your rifle and scope thoroughly to remove any debris or moisture, guaranteeing peak performance and longevity.
Finally, store your rifle in a safe, dry location, and double-check all mounting screws to guarantee everything’s secure before your next session.
Key Takeaways for Accurate Shooting
While you may have all the right gear, accurate shooting ultimately hinges on a few key principles.
First, understand your rifle’s scope adjustments like MOA and MRAD; these help translate angular measurements into precise bullet placement.
Practice consistently by maintaining a stable shooting position and controlling your breathing to build muscle memory.
Don’t forget to document your zero details, including rifle specifications and environmental conditions, for future sessions.
Always confirm your zero at the start of each outing to account for factors like wind and temperature.
Finally, verify your scope is securely mounted and aligned to enhance shot grouping at your desired zero distance; a quality setup with a zero stop feature can make all the difference.
Frequently Asked Questions
What Distance to Zero a Rifle Scope?
You should zero your rifle scope at 100 yards, as it strikes a balance for most shooting scenarios.
If you’re hunting, consider a point blank zero to maximize your effective range without constant adjustments.
Precision shooters might opt for a 100-meter zero for better long-distance accuracy.
If you’re just starting, zeroing at 25 yards can help get you on paper before fine-tuning for longer distances.
Always factor in your rifle’s use and ammunition type.
What Is the Correct Zeroing Point?
The correct zeroing point’s like finding the Holy Grail for shooters!
It often depends on your shooting style—precision shooters usually prefer a 100-yard zero, while hunters might lean towards a point blank zero for quick target acquisition.
Zeroing at 25 yards is great for initial adjustments before fine-tuning at longer distances.
Remember to account for environmental factors and document your zero details to maintain accuracy in future sessions.
What Are Common Mistakes When Zeroing a Scope?
When zeroing your scope, common mistakes include failing to securely mount it, which can cause inconsistent adjustments.
Don’t forget to account for environmental factors like wind and temperature, as they affect bullet trajectory.
Always confirm your zero after adjustments to avoid cumulative errors.
Also, make sure you’re shooting at the right distance for zeroing.
Finally, practicing proper shooting fundamentals is essential; a stable position and controlled breathing can make all the difference.
What Does the 3 9×40 Mean on a Scope?
The “3-9×40” on a scope refers to its magnification and objective lens diameter.
You can zoom in from 3x to 9x, making your target appear three to nine times larger.
The “40” indicates the diameter of the objective lens in millimeters, which helps gather light for a brighter image, especially in low-light conditions.
This combination makes the 3-9×40 versatile for various shooting scenarios, from hunting to target practice.
Conclusion
To summarize, by following these 10 simple steps, you’ll be well on your way to mastering your rifle scope.
Remember, “practice makes perfect.”
So take the time to verify everything’s set up right, and don’t rush the process.
After confirming your zero, keep your gear clean and ready for your next outing.
With patience and persistence, you’ll improve your accuracy and confidence in the field.
Happy shooting!
With these tips on how to sight your rifle scope, you’ll be ready for success in your next shooting experience.