8 Simple Steps to Sight Your Rifle Scope at 100 Yards
To sight your rifle scope at 100 yards, start with safety—ensure your firearm is unloaded and position yourself in a safe area.
Set up your shooting environment with a stable platform and prepare your target.
Next, bore sight your rifle to align the scope.
Fire a test group of three shots, then adjust your windage and elevation based on where the bullets hit.
Fine-tune your settings, and you’ll be ready to hit your mark.
There’s more to mastering this process!
Key Takeaways
- Set up a stable shooting platform and ensure a clear area for safety before beginning the sighting process.
- Bore sight your rifle to align the scope reticle with the barrel’s point of aim.
- Fire a test group of three rounds at the target to assess the initial point of impact.
- Make necessary windage and elevation adjustments based on the shot group analysis.
- Confirm accuracy by shooting another group and checking for a tight cluster around the target center.
Understanding the Importance of Sighting at 100 Yards
When you sight your rifle at 100 yards, you’re not just aligning your point of aim with where the bullet hits; you’re setting the foundation for accurate shooting in various scenarios.
Zeroing your rifle scope at this distance simplifies the calculations for bullet drop and helps you make adjustments for different shooting distances.
Most ballistic charts and reticles are designed for 100 yards, making it the ideal benchmark.
By achieving a proper zero, you guarantee accurate shots, which is vital for ethical hunting practices.
This accuracy reduces the risk of wounding animals, promoting responsible shooting.
Consistently sighting at this distance builds a reliable baseline, boosting your overall shooting precision and confidence for future hunts or target practice.
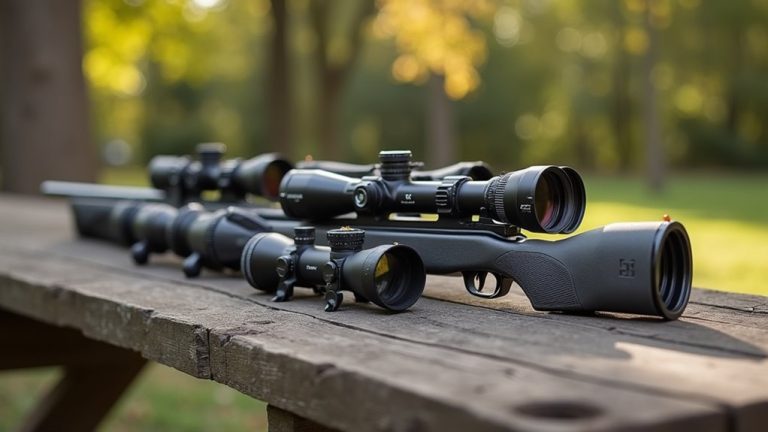
Essential Tools for Sighting In Your Rifle Scope
Before you start sighting in your rifle scope, make sure you have all the essential tools ready.
This includes your rifle and scope, the right ammunition, and a sturdy shooting rest for stability.
Don’t forget your protective eyewear and earmuffs to keep yourself safe during the process.
Required Equipment Checklist
Sighting in your rifle scope requires a few essential tools to secure accuracy and safety.
First, make certain you’ve got ear and eye protection to guard against noise and debris.
You’ll need a reliable rifle and at least two boxes of identical ammunition to maintain consistency while you work to zero a rifle scope.
A stable rest, like sandbags or a bench rest, is vital for minimizing movement when aiming at the shooting range.
Paper targets with a bullseye and one-inch grid will help you assess your shots and make necessary adjustments.
Finally, a spotting scope will aid in verifying shot accuracy without needing to shift from your position.
Prioritize safety throughout this process to guarantee a successful sighting experience.
Safety Measures First
Guaranteeing your safety is paramount as you prepare to sight in your rifle scope.
Start by wearing proper ear and eye protection to shield against loud noises and potential hazards. Next, set up a stable shooting rest, like sandbags or a bench rest, to provide a solid platform for accurate shooting.
Use paper targets with a visible bullseye and a one-inch grid; this will help you measure shot placement easily and make necessary adjustments.
It’s also essential to have at least two boxes of identical ammunition on hand, as this maintains consistency throughout your sighting process.
Finally, don’t forget to bring a spotting scope to verify shot placement, allowing for those precise adjustments to your rifle scope.
Step 1: Safety First
When handling firearms, it is crucial to prioritize safety above all else.
Always verify your firearm is unloaded and that the safety is engaged before beginning any sighting process to prevent accidental discharges.
Point the muzzle in a safe direction, adhering to fundamental rules of firearm safety.
Familiarize yourself with your rifle’s features, including how to operate the safety and any other mechanisms, before handling it.
Additionally, wear protective eyewear and earmuffs to protect yourself from potential injuries caused by recoil or noise.
Make sure the shooting area is clear of bystanders, creating a safe environment for everyone involved.
Step 2: Setting Up the Shooting Environment
Now that you’ve prioritized safety, it’s time to set up your shooting environment.
Find a stable shooting range or a safe area with a solid backdrop to keep everyone safe.
Make sure you have a sturdy platform and any necessary supports to help you aim accurately.
Safety Precautions First
Before you set up your shooting environment, it’s crucial to prioritize safety.
First, verify you’re at a proper shooting range or a safe rural property with a solid backdrop to contain any stray bullets.
Always keep the muzzle pointed away from yourself and others as you prepare.
Before you start shooting, confirm the area is clear of obstacles and bystanders to maintain a safe environment.
Wearing hearing protection, like earmuffs, is essential to safeguard your hearing from the loud noise of gunfire.
For stability, use a sturdy bench or table and incorporate a shooting rest or sandbags to minimize human error.
Safety should always come first to guarantee an enjoyable and responsible shooting experience.
Stable Shooting Platform
After ensuring a safe shooting environment, the next step is to establish a stable shooting platform.
Choose a sturdy bench or table at a shooting range or safe rural property, ensuring it has a solid backdrop. This setup helps maintain a consistent shooting position, which is essential for your accuracy.
Utilize shooting sandbags or a shooting rest to minimize human error, providing a stable base for your rifle.
Remember, your comfort and stability directly impact your shot placement. Don’t forget to wear protective eyewear and earmuffs to safeguard against potential injuries.
Familiarize yourself with your rifle’s recoil and trigger pull, and maintain a consistent shooting routine to enhance your overall performance.
Step 3: Bore Sighting Your Rifle
Bore sighting your rifle is an essential step in achieving accuracy, as it aligns the barrel with the scope reticle before you even fire a shot.
To start, verify your rifle is securely mounted and the scope is level. You can bore sight using visual methods, like looking down the barrel at a target, or with laser bore sighting tools for greater precision.
This preliminary alignment establishes a solid starting point, allowing you to accurately shoot without wasting time or ammunition.
Proper bore sighting is especially beneficial for new rifles or scopes that might need adjustments. By taking the time to bore sight, you set yourself up for success when it’s time to make your adjustments on the range.
Step 4: Fire a Test Group
Now that you’ve completed the bore sighting process, it’s time to fire a test group to fine-tune your scope’s settings.
Begin by positioning your rifle on a stable rest, ensuring consistent shot placement. Aim for the bullseye and fire three rounds in a single group to assess your average point of impact.
After shooting, observe where your shots landed in relation to the bullseye.
- Maintain consistent shooting techniques like grip and breathing.
- Document shot placements for accurate adjustment calculations.
- Identify how far your shots are from the bullseye.
- Prepare for necessary adjustments to your windage and elevation settings.
This process will help you achieve better accuracy and improve your overall shooting experience.
Step 5: Adjusting Windage and Elevation
As you analyze the results of your test group, it’s essential to make precise windage and elevation adjustments to align your shots with the bullseye.
Start by noting your average point of impact and determining how far it is from the bullseye.
Use the following table to guide your adjustments:
| Adjustment Type | Number of Clicks | Impact on Point |
|---|---|---|
| Windage | 4 clicks | Moves right |
| Elevation | 4 clicks | Moves up |
| Verify Changes | N/A | Fire new group |
Make adjustments in 1/4 MOA increments and keep track of the number of clicks.
After making changes, fire another group to verify that your point of aim now aligns with the bullet’s point of impact.
Step 6: Fine-Tuning and Confirming Accuracy
After making your scope adjustments, it’s crucial to fire another three-shot group at the target to see if your shots are aligning with the bullseye.
- Measure the distance from your shot group center to the bullseye.
- Remember that each turret click typically represents a 1/4 MOA change at 100 yards.
- Continue shooting multiple groups to average impact points and guarantee consistency.
- Confirm your accuracy by checking the tightness of your shot cluster.
If your shots aren’t where you want them, you may need to make further adjustments.
Keep in mind that a well-centered grouping indicates success, while a dispersed group shows you need to keep adjusting the scope to refine your point of aim.
Frequently Asked Questions
How Many Clicks to Adjust Scope at 100 Yards?
To adjust your scope at 100 yards, you need to know the click value of your specific model.
Typically, each click equals 1/4 MOA, adjusting your point of impact by 0.25 inches.
For example, if your shots are 2 inches low, you’ll make 8 clicks up.
If they’re 3 inches right, adjust 12 clicks left.
Always verify with multiple shots to ascertain accuracy after adjustments.
How Much Scope Magnification for 100 Yards?
So, you think you can just waltz into the shooting range without knowing your magnification?
For 100 yards, a scope magnification of 3x to 9x should do the trick just fine.
It strikes that perfect balance between seeing your target and not getting lost in the weeds.
If you fancy precision shooting, crank it up to 10x, but be ready for a narrower field of view.
Stick to 3-9x, and you’ll be golden!
What Is Zeroed at 100 Yards?
When your rifle is zeroed at 100 yards, it means the point of aim aligns perfectly with the bullet’s point of impact at that distance.
This setup gives you a reliable baseline, making it easier to adjust for longer or shorter shots.
Achieving this zero is essential for ensuring accuracy in both target shooting and hunting,
helping you place shots effectively and ethically on your target without worrying about misalignment.
What Zoom to Use at 100 Yards?
What zoom do you need to spot your target clearly at 100 yards?
A 3x magnification is often ideal for combat scenarios, balancing clarity and situational awareness.
If you’re aiming for precision shooting, consider a 10x or higher for finer details on smaller targets.
Just remember, too much magnification can hinder your field of view, making it tough to track moving objects.
Always guarantee your reticle stays clear and visible at your chosen zoom.
Conclusion
In the end, sighting your rifle scope at 100 yards is like tuning a musical instrument; a few minor adjustments can make a world of difference.
Just as a guitarist must find the perfect pitch to create harmony, you’ll need to fine-tune your scope for precision.
With practice and patience, you’ll hit your target consistently, transforming your shots from random notes to a symphony of accuracy.
So take your time, and soon you’ll be playing your own melody in the field—sighting your rifle scope at 100 yards with confidence.