Mastering Your Aim – Use a Rifle Scope Effectively
To master your aim with a rifle scope effectively, start by understanding its key components, like the objective and ocular lenses.
Guaranteeing proper mounting for alignment is crucial.
Zeroing your scope is essential, so choose the right distance and adjust windage and elevation as needed.
Establishing a stable shooting position enhances accuracy.
Regular care and maintenance keep your scope in top shape.
Discover additional techniques and tips that can further enhance your shooting performance.
Key Takeaways
- Master the components of your rifle scope, including the objective lens, ocular lens, reticle, and turrets for optimal accuracy.
- Properly zero your rifle scope by adjusting windage and elevation at a clear distance, usually starting at 25 yards.
- Establish a stable shooting position, such as prone or sitting, to enhance accuracy and control during shooting.
- Fire multiple shots to gather data on point of impact, making incremental adjustments to windage and elevation as needed.
- Consider environmental factors like wind, temperature, and humidity, and regularly maintain your scope for consistent performance.
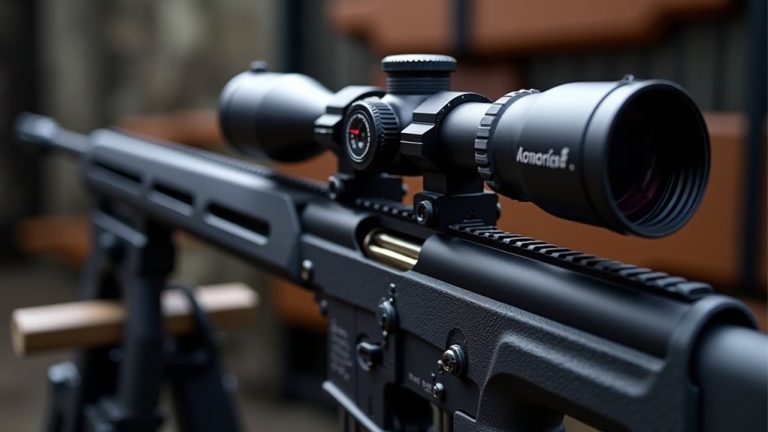
Understanding Rifle Scope Components
When it comes to mastering your aim, understanding rifle scope components is vital.
The objective lens, located at the front, gathers light to improve image clarity, especially in low-light situations. You’ll want to guarantee that your ocular lens is properly focused to magnify the target image, providing better visibility.
The reticle, or crosshairs, serves as your aiming device, giving you a visual reference for accurate targeting. It’s essential to choose a style that suits your shooting needs, whether that’s duplex, mil-dot, or illuminated.
Additionally, the turrets allow for precise adjustments in windage and elevation, helping you align the bullet’s point of impact with the reticle. Master these components for enhanced shooting accuracy and comfort.
The Importance of Mounting
When it comes to mounting your rifle scope, proper alignment is key to achieving accuracy.
You’ll want to guarantee stability by using techniques like a bubble leveler, and don’t forget to secure all components according to the manufacturer’s specifications.
Scope Alignment Techniques
Proper scope alignment is vital for achieving accuracy with your rifle. Misalignment can lead to significant bullet impact deviations, making precise shots difficult.
When you mount your scope, make sure it’s level and aligned with the barrel to maintain a consistent line of sight. Using a bubble leveler or a dedicated scope leveling kit can enhance your scope alignment, reducing the risk of cant, especially for long-range shooting.
Additionally, adjusting the turrets is essential for zeroing in, but don’t forget about eye relief distance. Finding the right eye relief prevents scope bite and guarantees comfort during recoil, allowing you to maintain proper alignment.
Regularly check your scope’s alignment, as environmental factors can alter its position over time.
Importance of Stability
Stability is vital for achieving accurate shots, and the mounting of your rifle scope plays a significant role in that stability.
A properly mounted scope guarantees alignment with your shooter’s eye, enhancing both comfort and precision.
Here are key factors to take into account:
- Mount Type: Choose between One-Piece or Scope Rings for ideal stability.
- Leveling: Use a bubble leveler to confirm the scope is perfectly aligned with the rifle.
- Height: Mounting at the correct height is essential to avoid misalignment.
- Torque Specifications: Tighten screws to the right torque—over-tightening can damage components, while under-tightening may cause shifting.
Securing Mounting Components
Achieving consistent accuracy with your rifle goes beyond just having a stable mount; it’s about securing every component involved in the process.
When you’re mounting a scope, proper alignment and secure mounting with the rifle barrel are essential. Choose the right mount type, like Picatinny or one-piece rings, and use a torque wrench to tighten screws to the manufacturer’s specs.
A bubble leveler can help keep your scope aligned, preventing tilting issues. Adjust eye relief to avoid scope bite and guarantee a comfortable shooting position for better target acquisition.
Regularly check your mounting components to verify they remain secure; loose screws can lead to a loss of zero and diminished shooting performance. Your aim depends on it!
Zeroing Your Rifle Scope
When zeroing your rifle scope, you’ll want to select a clear zero distance, often starting around 25 yards.
From there, you can fine-tune your aim by adjusting the windage and elevation settings based on the impact of your shots.
This process guarantees that your bullets hit where you’re aiming, even at longer ranges.
Selecting Zero Distance
How do you choose the right zero distance for your rifle scope? The selection largely depends on your intended use.
Consider these factors:
- Purpose: Are you hunting, target shooting, or defending?
- Distance: Common zero distances are 25 yards for initial zeroing or 100 yards for precision.
- Point Blank Zero: This allows for a forgiving aim across varying distances, ideal for hunters.
- Zeroing Process: Start at a closer range to guarantee you hit the paper, then confirm zero at your desired distance.
Adjusting Windage and Elevation
Once you’ve selected the appropriate zero distance for your rifle scope, the next step is adjusting windage and elevation to guarantee your shots hit the mark.
Start with windage adjustments using the windage turret, which typically moves your point of impact about 1/4 MOA per click at 100 yards. This allows for precise lateral corrections.
Next, focus on the elevation turret, also adjusted at 1/4 MOA per click, to compensate for bullet drop. Remember, zeroing a rifle involves firing a series of shots and aligning the crosshairs with the bullet’s impact.
It’s best to begin at 25 yards to confirm accuracy before fine-tuning at your target distance. Consistency in your shooting position is vital throughout this process.
Selecting the Right Zero Distance
Selecting the right zero distance can greatly impact your shooting accuracy, so what factors should you consider? Here are four key points to keep in mind:
- Intended Use: Hunters may prefer a point blank zero, while precision shooters often opt for a 100-yard zero.
- Starting Point: Zeroing at 25 yards is common for making adjustments and verifying shots are on paper at longer ranges.
- Distance Recommendation: A 100-yard zero balances bullet drop and trajectory for various shooting scenarios.
- Environmental Factors: Wind and elevation can affect bullet trajectory, so factor these into your zero distance choice.
Always verify your zero after adjustments, firing about 20 shots to confirm consistency and accuracy.
Setting the Initial Target
Setting your initial target is essential for effective zeroing. Starting at a closer distance—typically around 25 yards—ensures you hit the paper before moving to longer ranges.
Use a stable shooting position, like prone or sitting, to enhance your accuracy when setting your initial target. A boresighter can align your rifle’s bore with the target, streamlining this process.
Confirm your target is clearly visible and properly marked to aid in accurate adjustments. Document your initial target settings and any adjustments made; this information is invaluable for future sessions.
| Step | Action | Notes |
|---|---|---|
| 1. Choose Distance | Set at 25 yards | Ideal for initial target |
| 2. Establish Position | Use prone or sitting | Enhances stability |
| 3. Align Bore | Employ a boresighter | Streamlines aiming |
| 4. Mark Target | Verify visibility | Aids in adjustments |
Establishing Your Shooting Position
To hit your target consistently, establishing a stable shooting position is essential.
You can choose from prone, sitting, or kneeling stances, each offering support and minimizing movement.
Ideal Shooting Stances
While mastering your aim with a rifle scope, establishing an ideal shooting position is essential for achieving accuracy.
Here are four key stances to evaluate:
- Prone Position: Offers the most stability, lowering your center of gravity.
- Sitting Position: Provides good support while maintaining a solid grip and cheek weld on your aiming device.
- Modified Isosceles Stance: Ideal for standing shots; keep your feet shoulder-width apart and weight balanced to control sway.
- Weaver Stance: Another standing option that enhances stability and control.
Remember to align your body with the target and practice the natural point of aim technique with parallax adjustment for improved results.
Consistent practice will build muscle memory and boost your shooting performance.
Importance of Stability
Achieving stability in your shooting position is essential for ensuring accuracy, as even the slightest movement can throw off your aim.
To enhance stability, consider preferred positions like prone, sitting, or kneeling. The prone position usually offers the most stability because your body is in direct contact with the ground, minimizing movement.
Supporting your rifle on a solid surface or bipod further reduces recoil and improves shot placement. Additionally, maintaining a consistent grip and proper cheek weld against the stock helps you achieve a stable sight picture through the scope.
Regular practice in various shooting positions will develop muscle memory, leading to improved stability and accuracy in real shooting scenarios.
Prioritize stability to elevate your shooting performance.
The Fire and Adjust Process
Mastering the fire and adjust process is essential for honing your accuracy with a rifle scope.
Mastering the fire and adjust technique is crucial for improving your rifle scope accuracy.
This technique helps you fine-tune your aim by adjusting for windage and elevation based on your shots’ impacts.
Here’s how to go about it:
- Fire at least five shots to gather data on your point of impact.
- Analyze the group’s placement and note required adjustments.
- Make precise changes to the windage and elevation turrets, typically in 1/4 MOA increments.
- Confirm your zero at the desired distance, repeating the process until your shots align with the crosshairs.
Confirming Your Final Zero
As you prepare to confirm your final zero, it’s crucial to guarantee you’re shooting from a stable position, such as prone or sitting, to enhance your accuracy.
Start by using a fresh target at your desired distance, typically 100 yards, to verify that your shots align with the crosshairs after adjustments.
Fire a group of five shots, then measure the shot placement. Based on the grouping results, adjust for elevation and windage as needed.
It’s often recommended to fire around 20 shots during this process to establish consistency in your final zero.
Finally, document your zero details, including the rifle, scope, ammunition used, and any other relevant factors to help with future shooting needs.
Environmental Considerations in Shooting
When you’re out in the field, understanding environmental factors can make all the difference in your shooting accuracy.
Consider these key elements:
- Wind: Adjust your windage turret to account for wind speed and direction, as it can alter bullet trajectory considerably.
- Temperature and Humidity: These affect air density, influencing bullet flight and consistency, especially at longer ranges.
- Sunlight: Be mindful of glare or distortions that could cause parallax error, leading to aiming mistakes.
- Coriolis Effect: For long-distance shots, understand that Earth’s rotation can cause slight deviations in bullet drop.
Always confirm your zero at the start of each session to guarantee peak performance amidst these changing conditions.
Shooting Techniques With a Rifle Scope
Achieving accuracy with a rifle scope hinges on mastering essential shooting techniques.
First, focus on your holding technique; stability and control are fundamental for precise shot placement. Familiarize yourself with the reticle markings to help estimate range and make necessary adjustments.
Emphasize your holding technique for better stability and control, ensuring precise shot placement with your rifle scope.
Adopting stable shooting positions, like prone or sitting, will enhance your consistency and reduce movement. When it comes to magnification level, adjust it based on your target distance; higher magnification works best for long-range shots, while lower levels aid in quicker target acquisition.
Regular practice with your rifle and scope is essential. It’ll bolster your shooting skills and make you more adept at adjusting elevation and windage during your sessions, ultimately improving your overall accuracy.
Care and Maintenance of Your Rifle Scope
Caring for your rifle scope is essential if you want to maintain peak performance and accuracy. Here are some key maintenance tips to keep your scope in top shape:
- Clean the Lenses: Regularly use a soft lens brush and a microfiber cloth to clean the lenses and avoid scratches.
- Store Properly: Keep your scope in a cool, dry place to prevent moisture buildup and corrosion.
- Check Screws: Periodically check and tighten all screws and mounts to guarantee a secure fit and prevent misalignment.
- Maintain Electronics: If your scope has electronic features, keep the battery compartment clean and free from corrosion for consistent performance.
Troubleshooting Common Scope Issues
Even with proper care and maintenance, you might encounter issues with your rifle scope that can affect your shooting accuracy.
One common problem is over-tightened screws, which can cause misalignment.
Using a torque wrench for precise tightening is essential.
If the reticle appears blurry, adjusting the ocular lens can help you obtain a sharp image for better aiming.
Parallax errors may arise when the reticle doesn’t align with your target at different distances; you can easily fix this by adjusting for parallax.
Additionally, if you notice inconsistent groups, check your scope mounting for proper alignment and secure the mounting rings.
Regular maintenance, like cleaning the lenses and ensuring the battery compartment is free from corrosion, can also prevent issues.
Enhancing Your Shooting Performance
To enhance your shooting performance, it is crucial to understand the key components of your rifle scope.
Understanding the key components of your rifle scope is essential for enhancing shooting performance.
Mastering these elements will greatly improve your accuracy and precision at various distances.
Here are four critical tips to take into account:
- Familiarize yourself with the objective lens, reticle, turrets, and ocular housing for effective use.
- Zero your scope by aligning the bullet’s impact with the crosshairs, starting at 25 yards before fine-tuning at 100 yards.
- Adjust elevation and windage turrets in increments (e.g., 1/4 MOA) to account for bullet drop and wind drift.
- Maintain a stable position and proper holding technique to minimize movement and enhance accuracy, especially at longer ranges.
Frequently Asked Questions
What Are Common Mistakes When Zeroing a Scope?
Common mistakes when zeroing a scope include not ensuring it’s properly mounted and aligned with your rifle.
You might also skip confirming the zero at the desired distance, which can mislead you about bullet trajectory.
Additionally, neglecting a stable shooting position can introduce inaccuracies, while firing too few shots can give you a skewed idea of your zero.
Finally, ignoring environmental factors like wind can lead to a false sense of confidence in your setup.
Does Magnification on My Scope Affect Aim Point?
Yes, magnification on your scope does affect your aim point.
Higher magnification narrows your field of view, making it tougher to track moving targets.
You’ll also need to adjust your elevation and windage turrets more precisely, as perceived distance changes.
Plus, be mindful of parallax errors if your eye isn’t perfectly aligned.
Practicing with different magnification levels helps you understand how they influence bullet drop and wind drift for better accuracy.
Do You Follow the Bullet When Sighting in a Rifle Scope?
No, you don’t follow the bullet like a puppy chasing its tail!
Instead, keep your focus on the reticle and your shooting position.
Picture yourself as a statue, unwavering yet poised.
Each shot’s impact will tell you if you’re on target, not your wandering eyes.
Adjust your scope based on where that bullet lands,
and you’ll find your aim aligns with precision,
like a well-rehearsed dance—graceful and intentional.
Should I Zero at 100 or 200 Yards?
You should zero at 100 yards if you want a balance of accuracy for both short and long ranges.
It gives you a flatter trajectory for typical hunting distances, making it easier for quick shots.
If you’re focusing on long-range precision shooting, consider zeroing at 200 yards, but be aware of the bullet drop you’ll need to account for.
Ultimately, think about your typical shooting scenarios to make the best choice.
Conclusion
Mastering your aim with a rifle scope takes practice and patience, but it’s well worth the effort.
Remember, “Practice makes perfect.” By understanding your scope’s components, ensuring it’s mounted correctly, and zeroing it to your preferred distance, you’ll set yourself up for success.
Incorporate proper shooting techniques and regular maintenance, and you’ll see significant improvements in your performance.
Keep honing your skills, and soon, hitting your target will become second nature.
Happy shooting, and remember to master your aim!