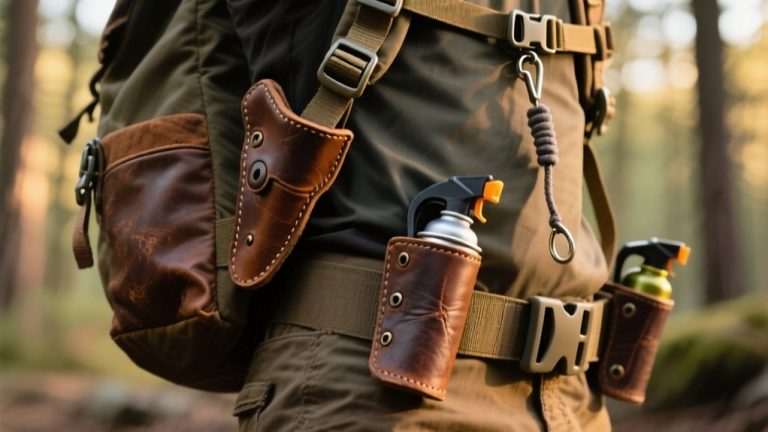
How to Use Holster Claw?
To use a holster claw, first attach it securely underneath your inside-the-waistband holster. Select the appropriate pad thickness for your comfort and concealment needs. Position the claw to push the gun grip firmly against your body, reducing printing and improving concealment.
Use a sturdy gun belt to maximize effectiveness. After installation, test adjustments for comfort and stability while ensuring the grip stays snug. Keep your claw maintained for lasting performance.
Uncover tips on fine-tuning and troubleshooting for the best results.
Understanding the Purpose of a Holster Claw
Although many concealed carriers focus on holster design and positioning, you shouldn’t overlook the holster claw’s role in reducing gun printing. The claw keeps your firearm close to your body by using your natural curves, which helps conceal the gun more effectively.
It mounts under the trigger guard on inside-the-waistband holsters and works well across various carry positions, like appendix or 3-5 o’clock. To function properly, it relies on a sturdy gun belt that pushes the grip back against your body.
Made from durable materials such as composite polymer, holster claws resist bending or breaking during daily use.
Many users find that the claw redistributes the firearm’s weight, enhancing comfort and boosting confidence by minimizing visible printing throughout the day.
Components Included in a Holster Claw Kit
Your holster claw kit comes with all the essentials you’ll need for a proper setup.
You’ll get two pads with different thicknesses, so you can customize how much push the claw applies.
Along with those, there’s the necessary hardware like a lock washer, a double-ended back post, a thick rubber washer, and small screws to keep everything secured firmly.
Knowing these parts makes it easier to install the claw correctly and really improve your holster’s concealment.
It’s all about getting that perfect fit!
Kit Parts Overview
A holster claw kit typically includes several key components that work together to boost comfort and concealment.
You’ll find two pads, one thick and one thin, that let you customize how the grip presses against your body.
The kit also comes with a lock washer and a double-ended back post, which secure the claw firmly to your holster.
A thick rubber washer is included to guarantee a tight, stable fit during installation.
To fasten the claw securely without affecting retention, the kit provides two small screws.
Each part is designed to improve your concealed carry experience by enhancing the holster’s fit and comfort.
Knowing these components helps you assemble and adjust your holster claw with confidence.
Pad Thickness Options
Two pad thickness options come with your holster claw kit, letting you tailor how the grip presses against your body.
You get one thick pad for an aggressive push and one thin pad for a more moderate pressure.
Installing the thick pad in the top hole maximizes how much the grip presses into your side, enhancing concealment by reducing printing.
If you prefer less pressure for comfort, swap in the thin pad instead.
You can easily switch pads during installation until you find the balance that suits your carry style best.
Adjusting pad thickness not only influences comfort but also how effectively the holster claw helps hide your firearm’s grip, making it a key customization to get right for daily carry.
Installation Hardware Details
Several key components come in a holster claw kit to guarantee a secure and customizable fit.
You’ll find two pads, one thick and one thin, that let you adjust how aggressively the claw pulls your grip toward your body.
The double-ended back post secures the claw firmly to your holster, ensuring stability during movement.
A lock washer is included to keep your screws tight, preventing them from loosening over time.
Furthermore, a thick rubber washer cushions the connection point, adding stability and reducing wear.
Finally, two small screws come with the kit for straightforward installation.
Understanding these parts helps you confidently assemble the holster claw, tailoring your setup for both comfort and secure retention.
Selecting the Right Holster for Claw Installation
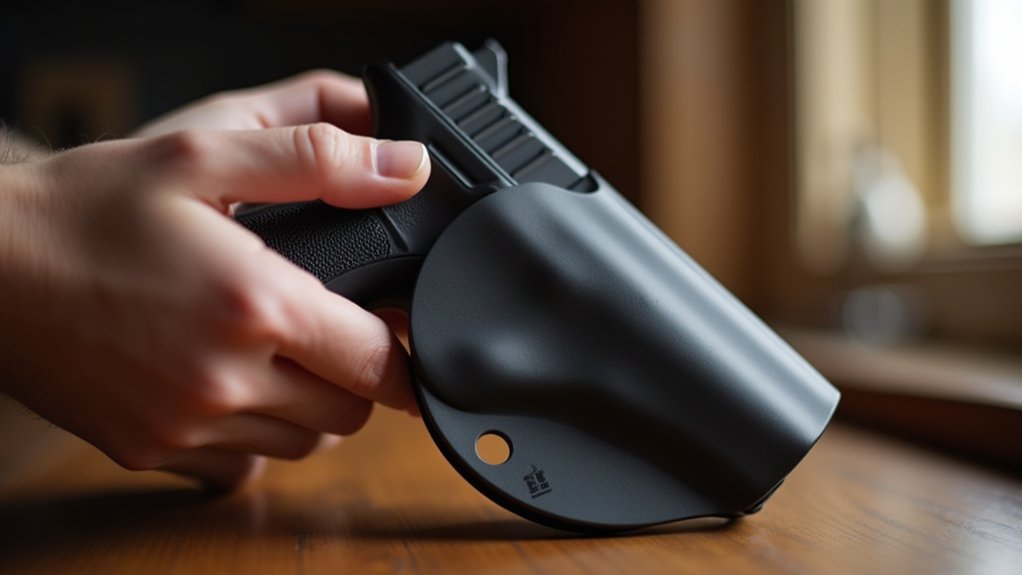
When selecting a holster for claw installation, you’ll want to focus on inside-the-waistband (IWB) models specifically designed to accommodate the claw.
Choose a holster from a reputable manufacturer like We The People Holsters to guarantee compatibility with the claw kit and reliable performance.
Make sure the holster includes a trigger guard area designed for claw mounting, so installation won’t compromise safety.
It’s also important to pick a holster that offers ride height and cant adjustments. This gives you the flexibility to maximize comfort and concealment.
Ultimately, verify that the material is durable enough to support the claw without bending or breaking during regular use.
Selecting the right holster is key to making your holster claw work effectively and comfortably.
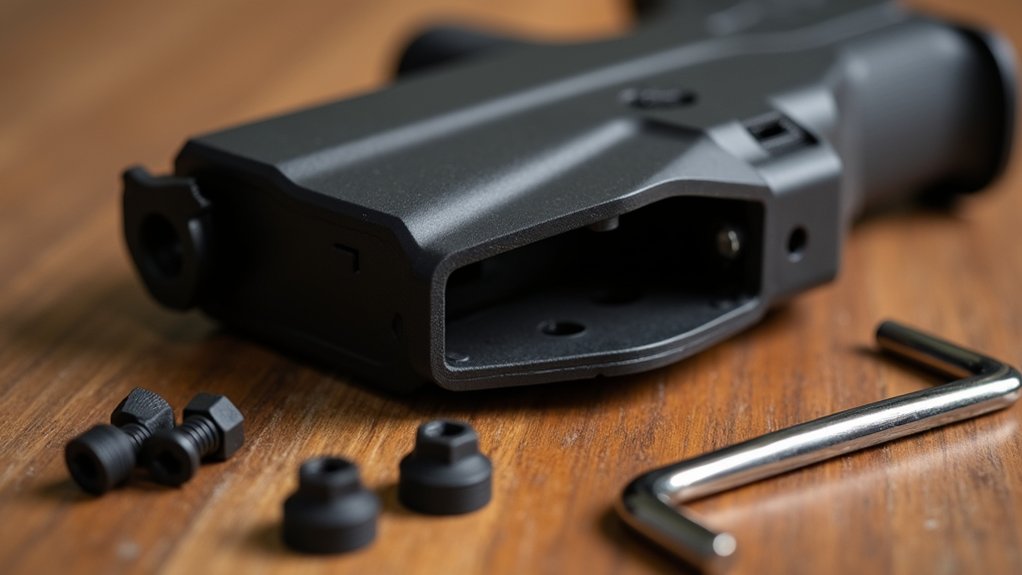
Necessary Tools for Installing a Holster Claw
To install a holster claw effectively, you’ll need a few essential tools on hand. Having the right equipment makes the process smooth and guarantees a secure fit.
Make certain your workspace is clean and organized to keep track of all parts. You’ll also want to follow the instruction picture included in the claw kit closely to avoid mistakes.
Here’s what you should have ready:
- Phillips head screwdriver for removing and fastening screws
- Swiss Army knife for small adjustments and handling parts
- Complete holster claw kit: pads, lock washers, double-ended back post, screws
- Clean, organized workspace to prevent losing components
- Instruction picture from the kit for proper assembly and installation
With these tools, you’ll be set for a straightforward and effective installation.
Preparing Your Holster for Claw Attachment
Before attaching the holster claw, make sure you’ve gathered all necessary tools and laid out your workspace clearly. Unpack the claw kit and check that the claw, screws, and adjustment pads are all present and in good condition.
Remove the retention screw from your IWB holster carefully, keeping all parts organized. Work in a clean area to avoid losing components. Refer to the included instructional picture to guide your preparation.
| Step | Action | Tip |
|---|---|---|
| 1 | Gather tools | Use Phillips screwdriver, Swiss Army knife |
| 2 | Unpack kit | Verify all parts are included |
| 3 | Remove retention screw | Keep screws safe |
| 4 | Organize workspace | Clean, well-lit area |
Step-by-Step Guide to Installing the Claw
Although it takes some careful handling, installing the holster claw is straightforward once you’ve prepped your holster.
Start by disassembling the retention part and organizing all components. Then, follow these steps:
Insert the long end of the double-ended back post with the rubber washer into your holster’s chosen side.
Place the claw on top, add a lock washer, and fasten it with a screw without affecting retention.
Choose between thick or thin pads and position them at the front or back to customize push strength.
Push the pad into the claw until it clicks securely.
Reassemble and test your holster’s retention to verify everything functions properly before carrying.
This method guarantees a solid, functional installation every time.
Adjusting the Claw for Optimal Comfort
Once you’ve installed the holster claw securely, you can fine-tune its position to balance comfort and concealment.
Start by choosing the claw’s placement, front or back of the holster, and select between thick or thin pads.
For a stronger push against your body, place the claw at the front with the thick pad. If you prefer moderate pressure, use the front position with the thin pad.
Positioning the claw at the back with the thick pad offers lighter push, while the thin pad there provides minimal pressure.
Make sure the claw aligns perfectly with your belt to reduce printing effectively without sacrificing comfort.
After each adjustment, test how the holster feels and looks, then tweak as needed until you achieve your ideal balance of concealment and wearability.
Choosing the Correct Pad Thickness
When selecting the right pad thickness for your holster claw, consider how much pressure you want against your body to reduce printing effectively.
The holster claw kit offers two pad thickness options to customize comfort and concealment.
Choose between two pad thicknesses to tailor your holster claw for optimal comfort and concealment.
A thick pad at the front pushes aggressively, minimizing printing for a snug fit.
A thin pad at the front provides moderate pressure, balancing concealment with comfort.
If you want a gentler push, placing the thick pad at the back reduces aggressiveness.
Choosing the right pad thickness guarantees you maintain comfort while keeping your firearm secure and concealed.
- Thick pad front: maximum printing reduction
- Thin pad front: moderate push, comfortable fit
- Thick pad back: less aggressive concealment
- Improves grip alignment with body
- Tailors pressure to your comfort level
Positioning the Claw for Effective Concealment
Choosing the right pad thickness sets the foundation, but positioning the claw on your holster shapes how well it conceals your firearm.
Position the claw at the front with a thick pad for an aggressive push that tucks the grip tightly against your body, minimizing printing.
If you want a moderate push, keep the claw at the front but use a thin pad, balancing concealment and comfort.
For a lighter push, place the claw at the back with a thick pad to maintain close contact without too much pressure.
A minimal push comes from positioning the claw at the back with a thin pad, offering discreet carry with little grip adjustment.
Try different combinations to find what works best for your comfort and concealment needs.
Testing Your Holster After Claw Installation
After you install the holster claw, you should test how it feels and functions in your preferred carry position.
Make sure the grip of your firearm is pressed back against your body for better concealment and comfort.
Wear the holster and check for printing while ensuring a smooth, secure draw.
Adjust the retention screw to balance security and accessibility.
Also, verify the claw’s alignment with your belt to confirm it utilizes correctly.
Finally, move around, bend, and twist to see if the holster stays comfortably in place without shifting.
- Wear holster in preferred position
- Confirm firearm grip presses against body
- Adjust retention screw for ideal tension
- Check claw alignment with belt for utilization
- Perform movement test for comfort and stability
Maintaining and Caring for Your Holster Claw
Maintaining your holster claw regularly guarantees it stays reliable and effective at reducing printing.
Start by inspecting it for signs of wear or damage to make certain it remains strong and functional.
Clean the claw and attachment points using a mild soap solution to remove dirt and debris that could hinder performance.
Store your holster claw in a cool, dry place to prevent material degradation from extreme temperatures.
If you notice any looseness or misalignment, tighten the screws promptly to keep it working properly.
Also, replace worn components like pads or screws as needed.
Troubleshooting Common Issues With Holster Claws
When your holster claw isn’t performing as expected, it’s usually due to installation issues, incorrect positioning, or material problems.
To troubleshoot common issues, check these key areas:
Make certain the claw is installed securely with the right pad thickness for effective grip pushback.
Ensure your holster claw is firmly installed with the proper pad thickness for reliable grip support.
Adjust the claw’s position and ride height if you feel discomfort or excessive printing.
Use a durable, high-quality claw to prevent bending or breaking under regular use.
Fine-tune the retention screw to maintain proper firearm grip without hindering draw or re-holstering.
Verify the claw aligns correctly with your belt and waistline, and use a proper gun belt for stability.
Following these steps will help you optimize your holster claw’s performance and comfort.
Frequently Asked Question
Can a Holster Claw Be Used With Outside-The-Waistband Holsters?
Trying to keep your firearm discreet while carrying outside the waistband? It’s a common challenge for many who want comfort without sacrificing concealment.
Holster claws have become popular for inside-the-waistband (IWB) carry because they use your belt to press the gun closer to your body, reducing printing and making your carry more comfortable and less noticeable.
But here’s the catch: holster claws don’t work well with outside-the-waistband (OWB) holsters. Since OWB holsters sit outside your pants, the claw can’t leverage your belt the way it’s designed to, making it ineffective.
With the rise in OWB carry for comfort and accessibility, understanding this limitation is key. If you prefer OWB holsters, you’ll want to explore other concealment strategies, like wearing longer shirts or jackets that naturally cover your firearm better.
To help you find the best OWB carry options and concealment tips, we’ve put together a guide that breaks down what works and what doesn’t.
Here are the top options and strategies that stood out after careful research.
Does a Holster Claw Affect Firearm Retention During Physical Activity?
Worried your firearm might slip or bounce around during a run or an active day? You’re not alone—many people wonder if adding a holster claw could make their gun less secure when they’re on the move.
Holster claws have become popular because they improve firearm retention by pressing the grip closer to your body. This means your gun stays put, even during intense physical activity like sprinting or sudden movements.
In fact, studies and user experiences show that a properly installed holster claw doesn’t just maintain retention—it enhances it, giving you more confidence in your carry without discomfort.
To clear up the confusion and help you find the best setup, we’ve tested and reviewed holster claws that balance secure retention with everyday comfort.
Whether you’re an active professional or just want peace of mind, this roundup will guide you to options that keep your firearm steady and accessible.
Here are the top options that stood out after extensive testing.
Are Holster Claws Compatible With All Handgun Models?
Ever had trouble keeping your holster securely in place during a quick draw? Holster claws are designed to improve retention and stability, making them a popular upgrade for many handgun owners.
In fact, many shooters find that adding a claw significantly reduces holster movement, enhancing comfort and confidence on the draw.
But here’s the catch: holster claws aren’t a one-size-fits-all solution. Compatibility depends heavily on your specific handgun and holster model.
While popular firearms often have claws tailored to fit perfectly, custom or less common guns mightn’t be supported. That’s why it’s crucial to check the manufacturer’s guidelines before buying or installing a claw—otherwise, you might end up with a poor fit or reduced functionality.
To help you navigate this, we’ve put together a guide that clarifies which holster claws work best with different handgun models and holsters.
This way, you can choose an option that fits securely and enhances your carry experience.
Here are the top options that stood out after extensive testing.
How Does a Holster Claw Impact Reholstering Speed?
Ever find yourself fumbling when reholstering your gun, especially with a new holster design? You’re not alone. Many shooters notice that adding a holster claw changes how the grip sits against their body, which can throw off their usual reholstering rhythm.
Holster claws have become increasingly popular because they help stabilize the firearm and reduce printing, making your carry more comfortable and discreet. In fact, many users report feeling more confident and secure with this setup once they adapt.
But that initial adjustment period can feel a bit tricky—your hand has to approach the grip from a slightly different angle to slide the gun back in smoothly.
If you’re wondering whether a holster claw will slow you down, this guide will break down how it impacts reholstering speed and what you can do to get comfortable quickly. We’ll help you understand the trade-offs and how to maintain fast, safe reholstering with a claw-equipped holster.
Here are the top options that stood out after extensive testing.
Can a Holster Claw Cause Discomfort During Extended Wear?
Ever felt uneasy wearing a holster all day, worrying it might dig into your side or cause discomfort? You’re not alone. Many people wonder if adding a holster claw will just make things worse.
With concealed carry becoming more common, comfort and concealment are top priorities. Surprisingly, a holster claw often improves both by redistributing your firearm’s weight and pressing the grip closer to your body.
This means fewer pressure points and less printing, making it easier to carry confidently for hours.
But if you do notice any discomfort, don’t worry—adjusting the claw’s position or changing the pad thickness can customize the fit to your body perfectly.
To help you find the most comfortable and effective options, we’ve rounded up the best holster claws that balance comfort, concealment, and adjustability.
Here are the top options that stood out after extensive testing.
Conclusion
Now that you’ve learned how to use a holster claw, you’re ready to improve your carry comfort and concealment. Installing and positioning the claw properly acts like an anchor, keeping your holster steady and secure all day.
Remember to test and maintain it regularly, so it performs like a well-oiled machine. With a little care, your holster claw will become an invisible shield, blending safety and comfort seamlessly into your daily routine.